Showing posts with label Maintenance. Show all posts

Tuesday, December 15, 2020

14 Tips for Roadside Emergency Safety


Roadside Emergency Safety Tips

If you're on the side of the road, you'll need to exercise caution. Follow these tips to move to safety and stay out of the danger of traffic, remaining as safe as possible.

  1. Take action immediately: If you notice car trouble, start moving over right way. If you wait too long, your car may stop moving before you're able to get off of the road.
  2. Get as far off the road as possible: If you're experiencing an emergency while driving, the most important thing you can do is get to a safe place. A shoulder will do if that's all you can manage, but it's best to exit freeways, turn off roadways, and pull into a rest stop or parking lot. Try to stop under a street light if possible. Never stop around corners or curves, on the bottom of a hill, or on a narrow road. Don't stop on a left shoulder unless you have no other choice, as you will be unable to get out of your car and walk off of the highway. Even if you're destroying your tire, keep going until you can get to safety. You may even save yourself tow truck fees if you're able to get to a parking lot where you can handle repairs.
  3. Warn others you're having trouble: Turn on your hazard lights, and if you have safety cones, signs, flares, triangles, or a light, use those as well to increase your visibility. If you're stopped at night, be sure to leave your lights on. You can also pop your hood to show others you're having car trouble.
  4. Call for roadside assistance: If you have roadside assistance through your insurance, cell phone carrier, or roadside club, give them a call immediately. They are typically available 24/7 with fast service that will take you to the nearest vehicle repair location. Remember to put their phone number in your cell phone so you'll always have it handy.
  5. Don't exit your car until it's safe: If you're having an emergency, you may feel panicked and want to investigate the situation immediately. But be careful about getting out of your car, especially if you're still near traffic. Get out of your car through the passenger side if there's traffic on the driver side. And of course, look for traffic before you open your door.
  6. Remember you're in traffic: If you're on the shoulder, keep in mind you and your car are not protected by the thin white line that separates you from the other cars speeding past on the freeway. All it takes is a distraction or wind to have a vehicle drift over into the shoulder, hitting your car. You should also take care to keep your distance from the flow of traffic. If you can't perform your own roadside repairs safely, it is best to remain in the vehicle with your seat belt on and doors locked. Don't stand behind or next to your vehicle.
  7. Be prepared with emergency supplies: Keep a first aid kit, extra water and food, and emergency repair supplies including tools, a spare tire, duct tape, jack, jumper cables, heavy duty rope, gloves, and fix a flat. You should also have flags, flares, or reflective triangles to warn other drivers that you're having trouble.
  8. Be careful about accepting help: It's best to call professionals or a trusted friend or family member who can help. Yet strangers who see you're having trouble may stop to offer assistance. They may be well intentioned, but you should use caution. Lower your window only enough to talk and use your best judgement in accepting their help. If you're waiting on roadside assistance or a tow truck, thank them for stopping but tell them you'll be taken care of.
  9. Know when to call a professional: Some vehicle owners can handle quick roadside repairs without help, but even the most savvy of DIYers can get in over their heads and end up in dangerous territory. Know when it's smart to call for help. While you might be able to handle a tire change in a parking lot, it's not a good idea to try to do the same while you're on a highway shoulder. Use your best judgement.

Monday, December 14, 2020

How to Apply Touch Up Paint


Get the Correct Touch Up Paint for the Color of Your Car

Get a touch up paint that matches the exact same color of your car before you start preparing your vehicle. This is very important. You do not want to use paint that has a lighter or darker shade than the one on your car. They have to match. The best automotive touch up paint should always be the same as the color of the car that it is going to be applied to.

Look for the color code of your car in certain sections of the vehicle. You should see a metal plate or a sticker on the door jamb of the driver’s side. Some vehicles have their color code on a sticker on the firewall. You can also check the glove box, the sun visor on the passenger side, the spare tire well or cover, and the trunk lid or floor. Sometimes the color code is present near the VIN of the car. This is a sticker you can see in the bottom right windshield.

If you cannot locate the color code, check the VIN of your car. Use this information to search for the color code of your car via online resources. Make sure you enter the exact brand, model, make, trim, and year model of your car in the search parameters of these online tools. This will help provide a more accurate color code for your car.

Prepare the Area You Are Going to Touch Up

Before you start with the process of how to touch up car paint, you will need to prepare the affected surface first. Wash your car with a car wash soap and water. It would be best to wash the whole car so you can identify other areas that need touching up. This can also help minimize, if not eliminate, the risk of getting grime and dirt in the new paint. Make sure to dry the area very well. Paint will not stick to a wet or moist surface.

Remove any rust on the surface. Use sandpaper to remove rusted areas. It is important to remove rusted areas to help minimize developing corrosion under the paint.

The outer surface of the car often has wax on it. You should remove this with a grease and wax remover. This will help provide a surface that touch up paint can adhere to. Use a 220-grit sandpaper to create a surface that will make it easy for paint primer to stick. This will also help remove any loose paint.

Wash the area with water and allow it to dry completely. This will help provide a cleaner, debris-free surface for the next step of learning how to use touch up paint.

Apply the Primer

A paint primer can help protect a metal surface from rusting. It also provides a surface to which the touch up paint can adhere. Having said that, it is not necessary to apply paint primer if the scratch does not go deep down to the bare metal of the car. If the scratch is only superficial, then you can skip the priming of the surface. You should always apply a primer if the area has an exposed metal surface.

There are vehicle owners who apply a coat of rust arrestor before they apply the primer. This will work, too. Rust arrestors are perfect for surfaces that have rusted. Washing and sanding the area will remove the rust. However, there is no guarantee that the surrounding areas are not yet affected by the existing rust. A rust arrestor will help prevent corrosion from spreading. If you wish to apply a rust arrestor or rust inhibitor, be sure to apply it before the primer.

In applying the primer, it is best to use a very small brush with pointed bristle head. Some people use a matchstick to help apply as little primer as possible. In most cases, a single drop of primer is enough to cover the affected area. Be very careful not to get the primer into the car’s original paint. If this happens, wipe off the primer at once. Allow the primer to dry before proceeding to the next step on how to apply touch up paint.

Apply the Touch Up Paint

It is often necessary to test the touch up paint on a hidden section of the car. You want to be sure that the color of the touch up paint is a perfect match to the color of your car. It is important to remember that some touch up paint manufacturers will not provide the best possible quality of product. There are cases when you may have the right color code, yet the paint reacts with the original paint.

It is for this reason that making a trial touch up of the paint is crucial. Try applying a small amount of the touch up paint on the lip under the car door. Make sure to clean the surface first so that dirt, dust, and grime will not get into the paint brush. This will also allow you to make a more accurate assessment of the paint application. If you’re satisfied with the results, you can then proceed to the application of the touch up paint on the affected area.

Use a very small brush with a pointed bristle. Apply a single drop of the touch up paint and spread it throughout the surface of the affected area. This will help avoid runoffs, which can ruin the finish of your car.

In this step of the process of how to touch up car paint, you will need to apply about 2 to 3 layers of the base coat. Wait at least an hour for the touch up paint to dry before applying the next layer. Check the paint manufacturer for the recommended waiting period in between applications. Drying one layer at a time can help prevent smearing when the next layer gets applied.

It is okay if the paint will be raised higher than its surroundings. You will still be sanding it off in the latter stages of the touch up process.

Once you have applied the touch up paint, leave your car for not less than 24 hours. This will help make sure that the base coat cures in the correct way.

Finish the Surface

The last step in the process of how to use touch up paint involves smoothening the area and the application of a clear coat.

We mentioned above that it is okay for the touch up painted area to be raised relative to its surroundings. You will be sanding this off so that it gets flush with the rest of the surface. You will need three grit sizes of sandpaper for this job. You will start with a 1000-grit sandpaper to help smoothen out as much of the painted surface as possible. Do it in a gentle and slow manner. Do not apply too much pressure as you can also sand the surrounding sections.

Once the surface is almost at level with its surroundings, use a 2000-grit sandpaper to continue with the sanding process. Finish this up with the 3000-grit sandpaper. This will create a very smooth surface but with enough microscopic ‘pores’ for the clear coat to adhere to. Make sure that the sanding process will make the painted area on an even level with the rest of the car. Wipe the surface to remove any dust from the sanding process.

Apply the clear coat using a small paint brush. Use uniform brush strokes to apply the clear coat. It is better to apply several layers of thin clear coats than having a single thick clear coat. Make sure to wait about 30 minutes in between application of the clear coat. Check the recommendations of the clear coat manufacturer. Some will recommend the application of several layers. Others will recommend that once is enough.

Smoothen the surface again using a 3000-grit sandpaper. This will help blend the clear coat with the rest of the clear coat of your car. It also ensures you have a smooth surface. Wipe down the surface and apply wax. Buff it well and you should be able to give your car that brand-new look.

Applying touch up paint is almost similar to painting your car. It involves preparing the car, applying a primer, applying the paint, and finishing it off with a clear coat. The only difference is that you are working on a very small area.

Sources:

  1. How to Touch Up Car Paint – WikiHow
  2. How to Apply BMW Touch Up Paint – It Still Runs

Thursday, December 10, 2020

10 Reasons For Wrapping a Car vs Painting


A wrap is a vinyl covering that is applied over the vehicle’s paintwork. It has increased in both flexibility and popularity over the last few years and now metallic, chrome and even color shifting vinyl wraps are available. The vinyl wrap starts as a liquid which is cast into a sheet and then processed through an oven where the solvents are evaporated and a solid film is left behind which is around 2 mm thick and is ready for printing. The film conforms well to the curved shapes of a vehicle and it is very durable. It is not prone to shrinkage but there can be some small bubbles under it when it has been applied.

Wrapping is an increasingly popular alternative to repainting a vehicle and here are the top 10 reasons why you may want to wrap your vehicle as opposed to painting it.

1. It is unique to your vehicle

2. You can remove it easily

3. It does not affect the resale value

4. It is less expensive than paint

5. You can use it on any vehicle

6. It is best for vehicle signage

7. It takes less time

8. It is easy to maintain

9. You take part in the design process

10. It can include windows

READ THE DETAILED EXPLANATION OF EACH ITEM HERE

The Final Word…

It is vitally important that your vehicle or vehicles, give the right impression of your business. Your brand needs continuity and your fleet of vehicles provides that. The overall effect needs to aesthetically pleasing and noticeable. It needs to look professional but must stand out from the crowd. You want people to be talking about your business for all the right reasons and it’s not an easy balancing act to achieve.

In terms of cost, flexibility and durability, vinyl vehicle wraps are preferable to complicated paint jobs. Also, should the worse happen and your vehicle becomes damaged, they are a lot quicker and cheaper to repair than damaged paintwork.

Even if you are not a business owner, you should consider vinyl wrapping as an alternative to getting a customized paint job on your car or truck. You can let your imagination run riot and save yourself a whole load of cash!

Wednesday, December 9, 2020

How to Remove Scratches from a Windshield


A scratched windshield not only undermines the integrity of this automotive component. It can also affect the visibility of the road. This can lead to accidents. You do not have to replace your windshield if it has scratches, however. What you can do is learn how to remove scratches from windshield. Here’s how:

Determine the Depth of the Scratch

It is important to find out how deep the scratch is. Try running a fingernail over the scratch. If your fingernail does not get snagged, then you have a superficial scratch. You can perform an easy windshield scratch repair in such types of scratches.

However, if your fingernail gets snagged on the scratch, then you will need a more professional approach. Deep scratches almost often require replacement of the windshield. This type of windshield scratch can spread very fast. They can also extend well into the other side of the windshield. No scratch repair kit would be enough to prevent the scratch from becoming a crack. This can cause windshield failure.

Get Ready with the Materials

The process of how to fix a scratched windshield calls for an auto glass repair kit. The kit already comes with everything you need to fix the surface imperfection on your glass. Make sure that the repair kit includes a rubbing compound that contains cerium oxide. This substance bonds to the scratch and forms a seal. It prevents the scratch from growing worse, helping prevent cracking or breaking the windshield.

There are other products that you can use. You can use an acrylic scratch remover as an alternative to cerium oxide. It works well on very light scratches. For those who are on a tight budget, a non-gel toothpaste also works. However, this will often require multiple applications to help fill in the scratches. If you want to use toothpaste, make sure that it contains baking soda. You can also mix a teaspoon of baking soda and an ordinary white toothpaste to serve as your rubbing compound.

If you are going to use cerium oxide, make sure that you have a dust mask and a pair of rubber cloves. This substance is quite harsh. Wearing goggles is also ideal.

Prepare the Windshield

Prepare the surface before you start with the process of how to get scratches out of windshield. Wipe off dirt and debris from your windshield using a soft, microfiber cloth. Spray a glass cleaner onto the glass and give it a good wipe. Make sure to dry the surface completely before you apply the scratch remover.

Do not use ordinary dish soap. A better alternative is to mix equal parts water and distilled white vinegar. An all-purpose cleaner will also do fine. If there are tough stains on the windshield, you can spray specialty glass cleaners. Otherwise, an ordinary window cleaner will suffice. Make sure to dry the glass completely.

Use a painter’s tape to cover the windshield’s edges. This will help prevent splatter from getting on the different parts of the car.

Apply the Scratch Remover

Wear your goggles, gloves, and dust mask whenever applying cerium oxide. Make sure that the place you are working on is well-ventilated.

Apply the rubbing compound on the scratched windshield. Use a clean piece of cloth to apply the rubbing compound. Most rubbing compounds look like toothpaste. They are easy to apply. Spray the rubbing compound with a little amount of water. Use a microfiber cloth to gently rub the compound. Avoid applying too much pressure. What you want is for the rubbing compound to fill the very fine cracks on the windshield.

Get a buffing machine and attach a soft buffing pad. Make sure that the buffing pad is designed for glass surfaces. Start with a low-speed setting if this is your first time buffing your car. You can always quicken the pace once you feel more confident about how to remove scratches from windshield.

If you are going to use a non-gel toothpaste as a method of windshield scratch repair, start by rinsing the microfiber cloth in warm water. Wring it until the cloth is just, not soaking wet. Apply a small amount of non-gel toothpaste on the microfiber cloth. Rub the toothpaste onto the scratch in a circular manner. This will help fill the scratches with the toothpaste. Rinse the cloth and reapply the toothpaste. You may have to do this several times. When you’re done, you can wipe your windshield in long strokes; not circular motions.

You can also observe the same procedure if you are going to use baking soda or metal polish.

Be sure to wipe away any excess rubbing compound on your windshield. Always use a microfiber cloth to help avoid scratching the glass. Inspect the glass if you can still see scratches. If so, then there is a chance that the rubbing compound did not fill the small cracks properly. Reapply the compound over these areas and buff it again. Try to align the buffing pad’s edge over the scratch to help ‘drive’ the compound into the spaces.

Let the Rubbing Compound Dry

It is important to allow the rubbing compound to dry completely. This should take about 30 minutes or so. Once dried, you can finish up the process of how to get scratches out of windshield. Remove the painter’s tape that served as edging for the windshield. Wash the windshield very well. Rinse it and dry it with a microfiber cloth.

Reapply the Compound on a Regular Basis

The rubbing compound tends to wear over time. That is why it is ideal to reapply the rubbing compound on a regular basis. This will fill the small cracks with new material and prevent the cracks from growing worse. Always start by cleaning your windshield before applying the rubbing compound. Rinse it, dry it, and polish it for a better look.

Fixing a scratched windshield is easy if the scratches are only superficial. If they are too deep, your best recourse will be to have an auto shop inspect the glass. You may have to replace the windshield if the cracks are worse than you imagined.

READ MORE HERE

Tuesday, December 8, 2020

Common Signs of a Dirty Air Filter


To generate power, a car engine combines both air and gasoline. The former gets to the engine through an air filter which is designed to keep out a host of debris including dirt, bugs, pollen, and other harmful contaminants. After it has been in use for a while, it will not function as effectively as it once did. And when this happens, less air will reach the engine, which can lead to extensive car trouble further down the line. As a rule of thumb, it is recommended that you change the filter every 10,000 to 15,000 miles.

If you get regular tune-ups at your local garage, many mechanics will automatically check if the filter to see if it needs replacing or not. However, you don’t want to only rely on others. It is important that you are able to identify some common warning signs yourself. Otherwise, you could end up causing further damage to your vehicle which was easily avoidable.

The question remains: how can you tell if your air filter is dirty? Well, we are going to help you answer this query by talking you through some of the most common signs that it is time for a replacement filter. So, here are the top 10 indicators that you need to take action on your air filter.

1. Air Filter Appears Dirty

2. Reduced Fuel Economy

3. Misfiring Engine

4. Strange Engine Noises

5. Bad Spark Plugs

6. Check Engine Light On

7. Reduced Horsepower

8. Flames or Black Smoke from Exhaust Pipe

9. Strong Fuel Smell

10. Rough Idle

To know more the detailed explanation of each indicators, read here

Conclusion

Replacing your air filter when it is dirty is a simple job to do, but it makes such a big difference to the performance of your vehicle. Just a few of the issues which can arise if you don’t tackle this task quickly are an increase in harmful emissions, damaged spark plugs, engine build up, and wasted fuel. All you need to do is keep your filter clean and well-maintained to stop yourself from needing an expensive fix. This can also help to extend the life of your vehicle. The longer you drive a vehicle with a dirty air filter, the more you will be wasting fuel, and the greater the chance that a serious issue will occur. If you don’t think that you can replace the filter by yourself, you will need to visit your local mechanic to get a professional to do the job for you.

Monday, December 7, 2020

How Often Should I Change My Oil?


The answer to this question will depend on the make, model, and age of your vehicle. Older vehicles will still benefit from getting an oil change every 3,000 miles. Many newer vehicles need an oil change every 5,000 to 7,000 miles. Some luxury vehicles can go as many as 15,000 miles before needing an oil change.

Another way to determine if it’s time to change your oil is by time. Oil breaks down and degrades over time. So even if you aren’t driving many miles, it may be time to change your oil. The traditional advice was every three months. If you drive a newer vehicle, then you’re safe getting the oil changed every six months or so. For vehicles that are rarely driven or kept in the garage a majority of the time, then you should change the oil at least once a year.


  • Check With Your Manufacturer

So far, we’ve given general guidelines. The safest thing to do is check with your vehicle manufacturer. They were the ones who built the car and will have the best answer for how often your specific vehicle should have its oil changed. A good place to look is in your owner’s manual or ask the dealership.

  • Your Driving Style 

The guidelines that you have here and the advice you get from your vehicle manufacturer are only a starting point. Harsher driving conditions will require you to change your oil more often. This could mean more severe driving, such as regular towing, off-roading, or racing. It can also mean more extreme climates, such as especially hot or cold temperatures.


READ MORE HERE

Sunday, December 6, 2020

17 Ways to Save Money on Car Maintenance


Maintaining a vehicle can be expensive. There's gas, oil changes, scheduled maintenance, new tires and brake pads, and even the odd check engine light to take care of now and then. If you're running to the dealership or the most expensive shop in town for every task, you're spending too much. But you're also asking for trouble if you're completely ignoring car maintenance, too.

Properly maintaining your vehicle doesn't have to be expensive, and done responsibly, you'll save money on maintenance and ongoing care for your car. You can save on parts, labor, efficiency, and more simply by being smart about how you maintain your vehicle.

Friday, December 4, 2020

How To Make Homemade Windshield Washer Fluid


A clean windshield is a vital part of safe driving. Smears, dirt, dust, and other debris can significantly reduce or distort your vision, particularly in poor driving conditions. However, traditional windshield cleaners contain methanol. Even in small amounts this chemical can be dangerous and have detrimental effects on health and the environment. Given this, many drivers are looking into safer and potentially cheaper alternatives. While other store-bought options are not always as effective or less polluting, the good news is that it is relatively simple to make your own windshield washer fluid at home.

Thursday, December 3, 2020

How Long Do Tires Last?


How Long Do Tires Last?

The short answer is that it depends on a lot of factors. The type of tire you buy, the climate you drive in, your driving style, the tire’s rubber compound, your vehicle, your maintenance routine, and the tire’s overall age will all influence how long a tire will last. Tires wear down over time, it’s inevitable. However, driving with bald tires is a risk of its own and you should be very careful before you decide to take that step.

A general rule is that a tire should last about four to five years or 60,000 to 75,000 miles. If you don’t drive often, you may fit the year threshold first. If you drive a high amount of miles, then you may hit the mileage threshold long before the year guideline.

Different Types of Tires

There are four general categories of tires: all-season, summer, winter, and all-terrain. The type of tire you buy and the climate you drive them in will influence the rate at which the tire wears away. For example, all-terrain tires are meant for driving off-road. If you regularly drive with these tires on pavement, they’ll wear away more quickly than the manufacturer intended because you’re using them in a manner they’re not designed for.

Treadwear Ratings

Tire manufacturers must put a treadwear rating on each of their tires. This is a number rating that’s given to the tire based on its performance against a control tire. The control tire is assigned a treadwear rating of 100.

Each tire is then given a rating based on its comparative performance against the control tire. So a tire with a rating of 200 will have taken twice as long for the tread to wear away as the control tire. If you’re curious about what your tire’s treadwear rating is, you can look them up on the NHTSA database of tire ratings. It also should be printed on your tire, but depending on the age and wear of your tire, it may not be legible.

The bulk of tires on the market today have a rating in the 201-500 range. The higher your tire’s rating, the longer your tire should last.

  • 15 percent are rated below 200
  • 25 percent are rated 201-300
  • 32 percent are rated 301-400
  • 20 percent are rated 401-500
  • 6 percent are rated 501-600
  • 2 percent are rated above 600
  • Drive Style

    The more aggressively you drive, the faster your tires will wear. This is because you’re putting more demand on them. If you’re the type to step on the gas when the light turns green, then you’re wearing away your acceleration tires faster than necessary. To see if this is happening to you, take a look at the tires that receive the power from the engine. If you have a front-wheel drive car, then it’s your front wheels. Rear-wheel drive cars will have you looking at the back tires.

    When your acceleration tires are noticeably more worn than your other tires, it means you’re accelerating too hard. The tires are working extra duty to grip the road as increased energy and torque are applied for your vehicle to accelerate.

    This same sort of accelerated wear happens if you are braking hard too often. This also requires the tire to work harder, and thereby wear away faster.

  • Rubber Compounds

    Not all tires are built the same. Different rubber compounds are used depending on the final intended use of the tire. Summer and performance tires tend to have softer rubber compounds that are designed to excel in higher heat. Unfortunately, the softer rubber also tends to wear faster.

    Winter tires tend to have harder rubber compounds because the rubber needs to stay functional in frigid temperatures. While this means you’ll have less wearing, it does put the tire at a bigger risk of chipping. This is especially true of winter tires that are meant for driving on snow and ice. Take them for a cruise on asphalt, and you’ll find them wearing away incredibly fast.


  • WANT TO KNOW MORE? READ HERE.

  • Wednesday, December 2, 2020

    16 Things You Can do to Survive a Car Accident


    What to do During a Car Accident

    In many accident situations, there's not much you can do to make things better. In fact, you may not even see the accident coming, or it happens so fast, you can't make any adjustments to make yourself safer. But if you do have the chance to act, consider these tips that can reduce the severity of the crash and keep you safer:

    • Trust your anti lock brake system: Most vehicles today come equipped with anti lock brakes, a system that will pump brakes faster than you're able to in order to slow down your vehicle efficiently. If you need to brake quickly, just hold your brakes firmly and allow the ABS to pump your brakes for you. You may feel the pedal vibrate so that you know it's working. This system works best when your wheels are pointed straight forward.

    Tuesday, December 1, 2020

    10 Car Maintenance Myths that are Actually False

    10 car myths that are actually false


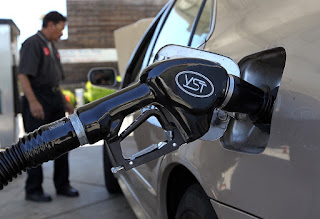
     1. Premium Gasoline is the Best for Cars

    People have this idea that the higher the octane rating of the fuel, the better it is in improving engine performance. What they fail to realize is that high octane premium fuel often comes with special formulations. These feature protectants and cleaners that will help keep high-performance engines in tip top shape. The question now is whether you have a high-performance, high-compression engine under the hood of your vehicle. If you don’t, then there is no point using premium gasoline.


    To be safe, always check the recommended fuel octane rating of the vehicle manufacturer. Carmakers always put the recommended fuel types and minimum octane ratings in their owner’s manuals. It would be in your best interest to check these vehicle-specific manufacturer recommendations.